
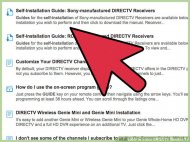
Download the self-installation guide from the DIRECTV website. You may need a software program such as Adobe Reader to view the file.
Follow national and local guidelines for installing your dish. There may be requirements or codes that restrict the size of your satellite dish or how high you can mount it. DIRECTV offers 6 satellites in sizes from a round 18-inch (45 cm) dish to a 36 by 22-inch (90 by 55 cm) oval dish.
Find an appropriate location for your satellite receiver. Look for a clear, southern-facing area with a high vantage spot.
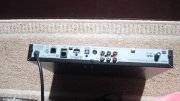
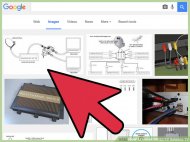
Find coordinates for pointing your dish to get reception. Connect your satellite receiver to the TV as specified in the receiver's manual.- Connect 1 end of a coaxial cable to the satellite receiver through the jack labeled "OUT TO TV." Connect the other end to the antenna's "IN" jack on the television.
- Connect both the television and satellite receiver to a power outlet.
 Turn them both on.
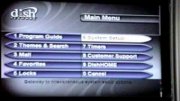
 - View the receiver's menu by tuning the television to channel number 3 or 4 if the back of the receiver has a "CH 3/CH 4" switch. If there is no switch, turn to UHF channel 14 or channel number 65 on cable.
- Navigate the menu using buttons on the receiver's front panel and the receiver's manual to find the correct azimuth (horizontal) and elevation (vertical) coordinates.
Determine and survey the dish's exact mounting site. Using the receiver's pointing coordinates, find the mounting site for your dish.
 Measure the number of feet (meters) of cable needed to finish the installation.
Start assembling the satellite receiver dish. Bolt or screw in the satellite's plastic or metal reflector to its support arm. This lets you preset the satellite to its correct elevation.
Set your dish to the correct elevation.
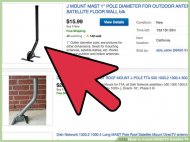
Mount the mast, or pole, for the receiver. Multiple options exist for this step depending on where you install the dish (roof, hollow wall, on brick or concrete, etc.). Consult the self-installation guide to see instructions and the necessary tools for each option.
10
Make sure the mast is level to get a satellite signal. Use a bubble level to help you determine it is even.
 11
11
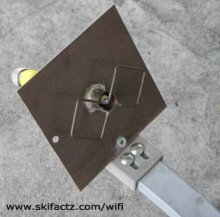
Put the satellite receiver dish on its mast. Hook up the RG-6 coaxial cable to the Low Noise Block converter (LNB). Attach the LNB to the receiver's support arm.
12
Position a grounding block as closely as you can to the place where the dish's cable will run into the house. Run the receiver dish's cable to the grounding block. The connection to the block binds the dish to an acceptable grounded point in the main building ground, such as an enclosure for electrical service equipment or a metallic service raceway.
13
Run the RG-6 coaxial cable to the back of the receiver inside the house. The RG-6 cable should also be connected to the grounding block.
14
Hook up the RG-6 coaxial cable to the "SATELLITE IN" jack on the receiver's rear panel.
15
Make sure a landline phone is off its hook to avoid getting an electric shock from any incoming calls. Connect the receiver to a phone jack with the phone line.
16
Check for a signal using the "Dish Pointing" menu's signal meter displayed on your TV screen. Adjust the dish's pointing to achieve your maximum signal strength.
Source: www.wikihow.com

|
DIRECTV D12-100 Factory Remanufactured Digital Multi-Satellite Receiver Home Theater (DIRECTV)
|

|
Genuine Mazda Accessories 0000-81-L22 Satellite Radio Receiver Kit Automotive Parts and Accessories (Mazda)
|
|
IR Extender Neoteck Infrared Remote IR Repeater Extenders with 1 Receiver and 1 Emitter Hidden IR System for Amplifier Satellite TV Receiver CD Player DVD Player Blu-ray Player CE (Neoteck)
|
|

|
SiriusXM Satellite Radio SSV7V1 Stratus 7 Satellite Radio (Black) Wireless (Audiovox - Sirius)
|

|
Genuine Subaru H621SSC001 Satellite Radio Kit Automotive Parts and Accessories (Subaru)
|
Related posts: